
エンドポイントを作る前に
まずはワークフローページから

https://developer.ebay.com/marketplace-account-deletion
developer.ebay.com
ワークフローページ内にエンドポイントを求める理由やエンドポイントの作り方などなど書いてあるので興味があれば読んでみてどうぞ
サーバーについて私はXserveを契約しているのでそのやり方を書きます

受信プログラムを作る
ワークフローページに盛り込む項目や条件、「Node.js/Java/Python/C#/PHP」それぞれのコードスニペットが書いてあるのでGoogle翻訳を駆使して作ります
まず必要な内容として
- GET呼び出しの形式でchallenge_codeを受け取るように作る
- エンドポイントURLは「https」プロトコルを使用する必要がある
- パスに内部IPアドレスまたは「localhost」が含まれていてはならない
- ヘッダーに’application/json‘を設定してJSON形式でレスポンス:200とchallengeCode + verificationToken + endpointの順でハッシュした値を返す
- verificationToken は32〜80文字で英数字+アンダースコア(_)、およびハイフン(-)で作る
※verificationToken のパスワード生成は↓↓なんかを活用

パスワード生成(パスワード作成)ツール
パスワード生成(パスワード作成)するweb・ウェブ制作に役立...
www.luft.co.jp
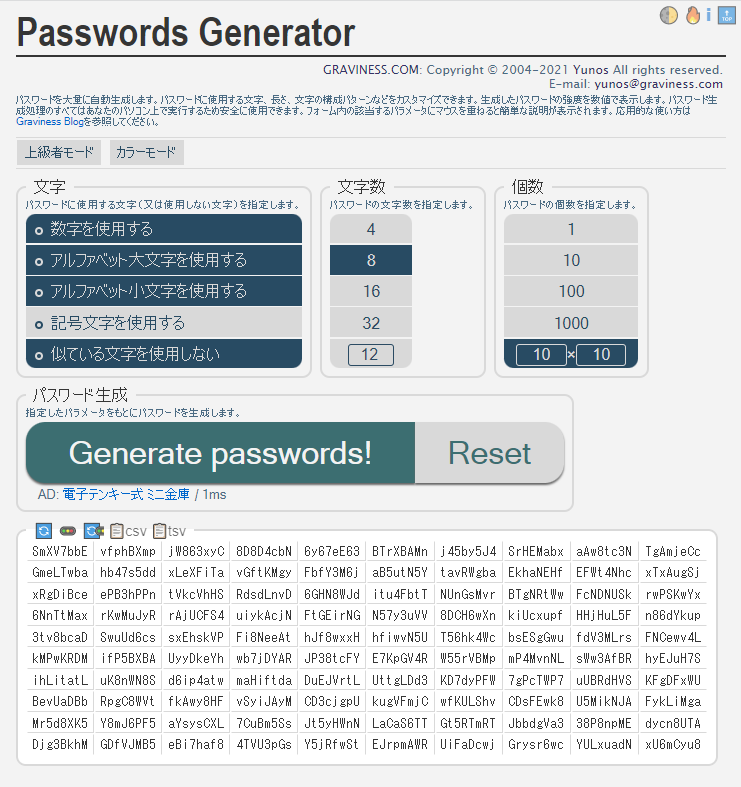
Passwords Generator
パスワードを大量に自動生成可能な無料のオンラインツールです。...
www.graviness.com
その結果、出来上がるファイル(PHP)はコチラ※10-16行目はコードスニペットをそのまま流用
<?php
header('HTTP/1.1 200 OK');
header("Content-Type: application/json; charset=utf-8");
$verificationToken = 'zq8mT8VSSycttCZGwRMtifqhaQMiB695swLHAt2e';
//ディレクトリとファイル名はお好きなように
$endpoint = 'https://<自分のドメイン>/ebayApi/endpoint.php';

if(isset($_GET['challenge_code'])){
    $challengeCode = $_GET['challenge_code'];
    $hash = hash_init('sha256');

    hash_update($hash, $challengeCode);
    hash_update($hash, $verificationToken);
    hash_update($hash, $endpoint);

    $responseHash = hash_final($hash);
    echo json_encode(array("challengeResponse"=>$responseHash));
}
?>
Xserverの中に保存場所を作る
ディレクトリは受信プログラムに書いたのでそれと合わせる
※今回なら「ルートディレクトリ → ebayApi」
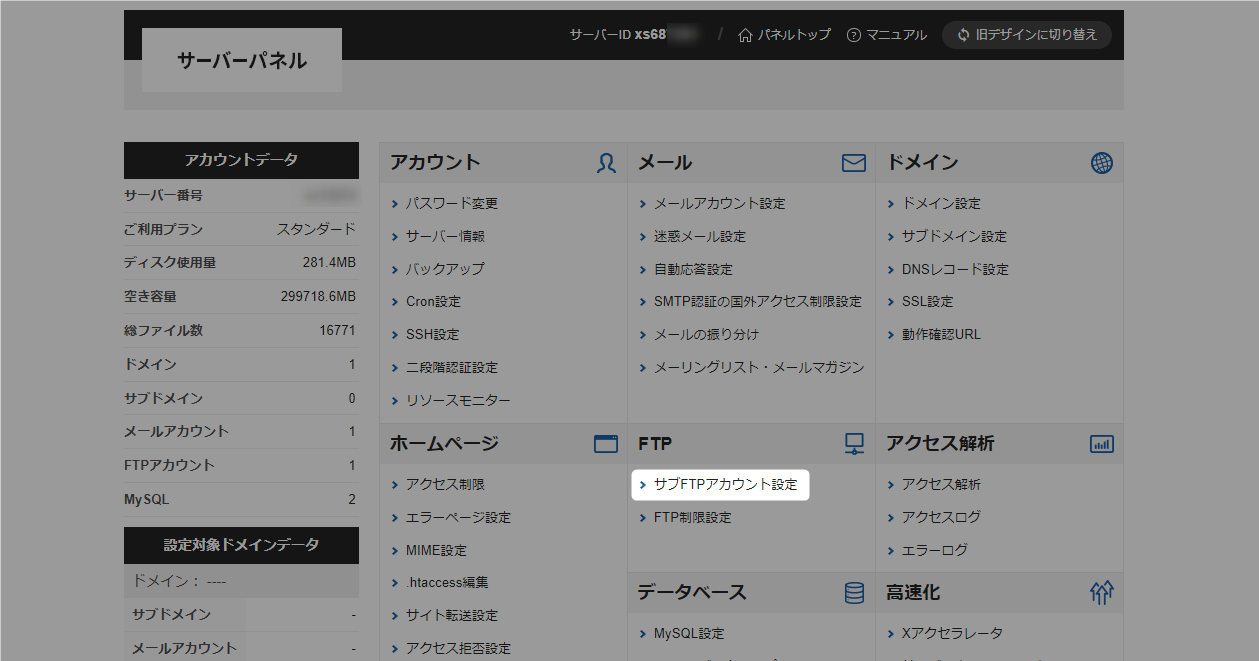
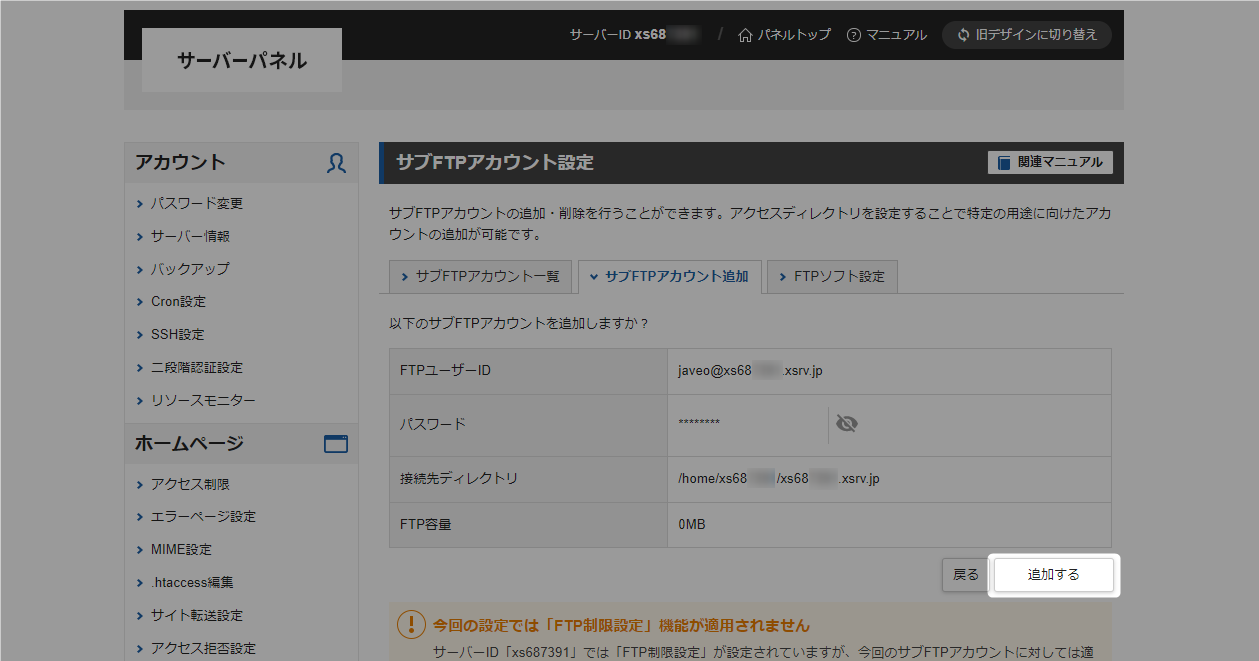
XserverでサブFTPアカウントを設定する
XserverのサーバーパネルからサブFTPアカウント設定メニューへ
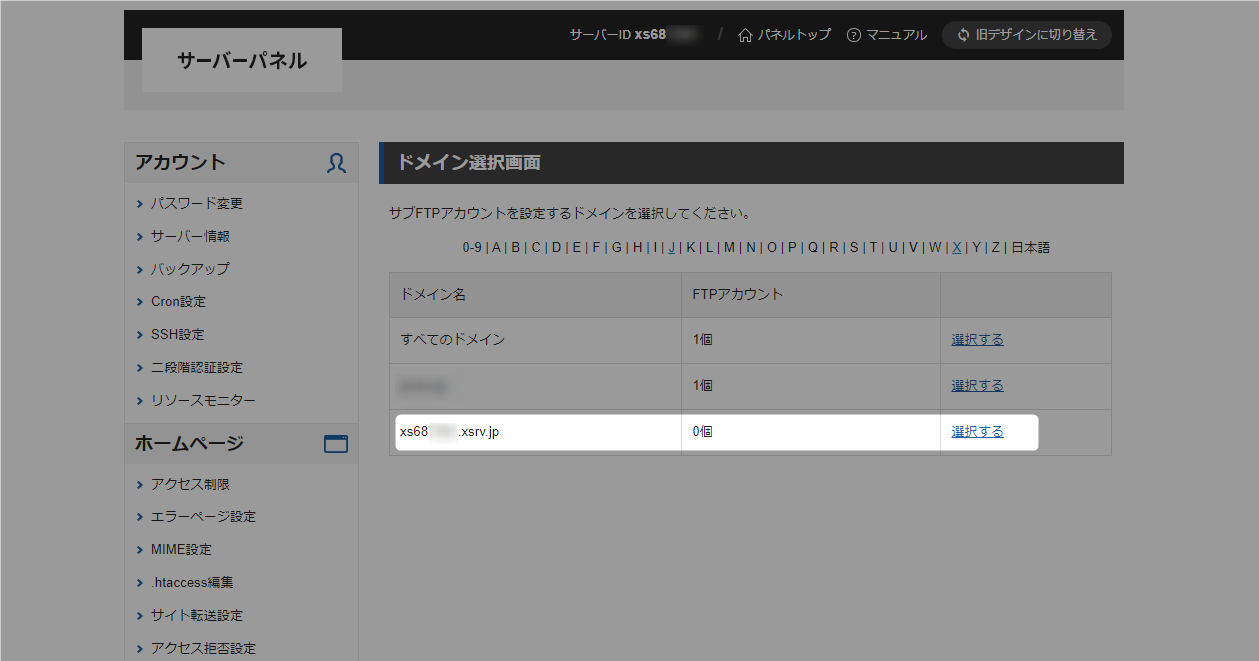
エンドポイントを設定するつもりのドメインを選択
お好きなFTPユーザーIDとパスワードを設定
接続先ディレクトリはドメインをそのまま貼り付ければOK
入力したら「確認画面へ進む」をクリック

「追加する」をクリック
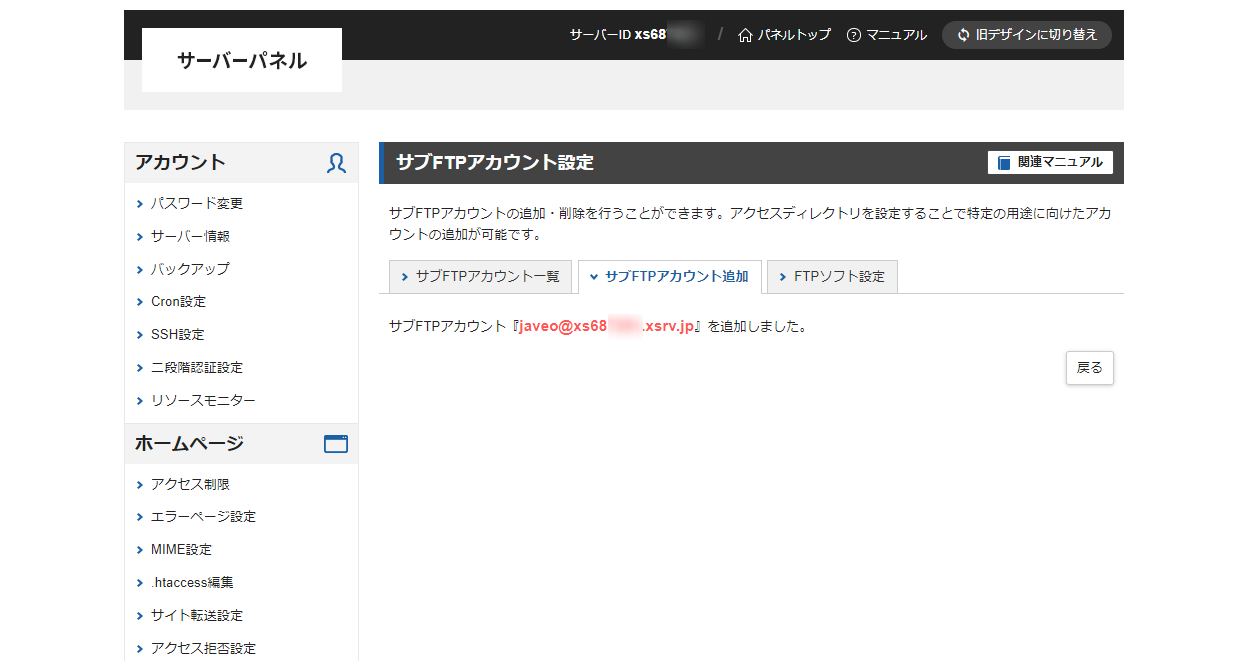
サブFTPアカウントの作成完了
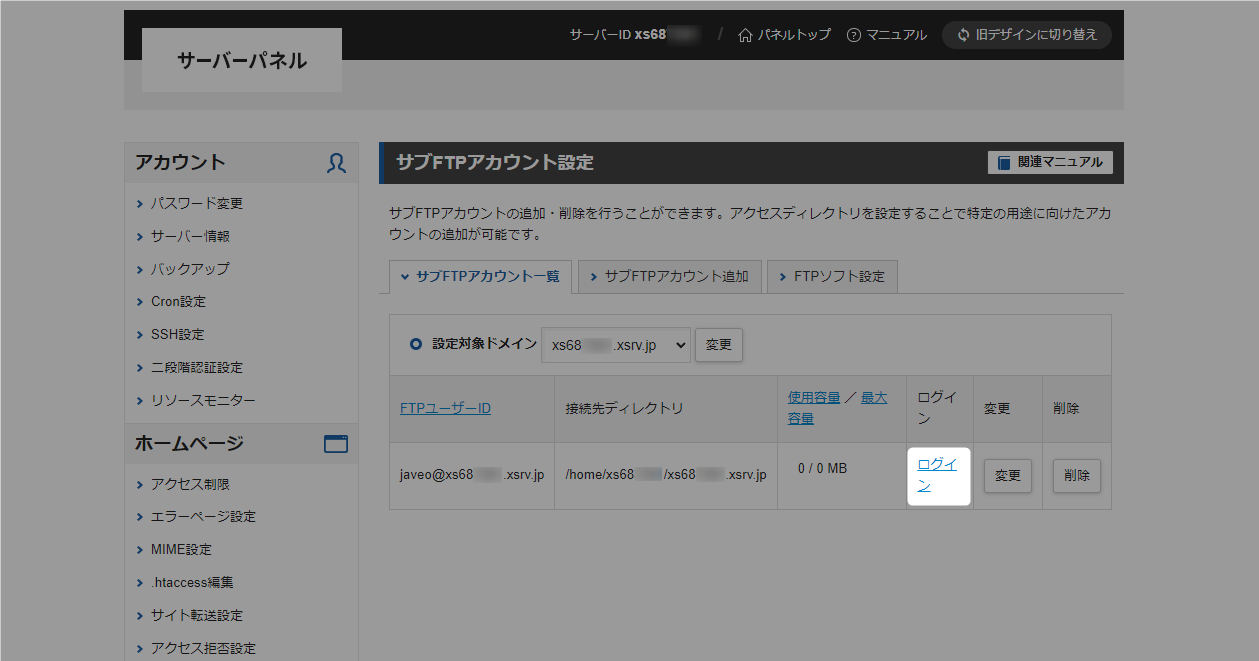
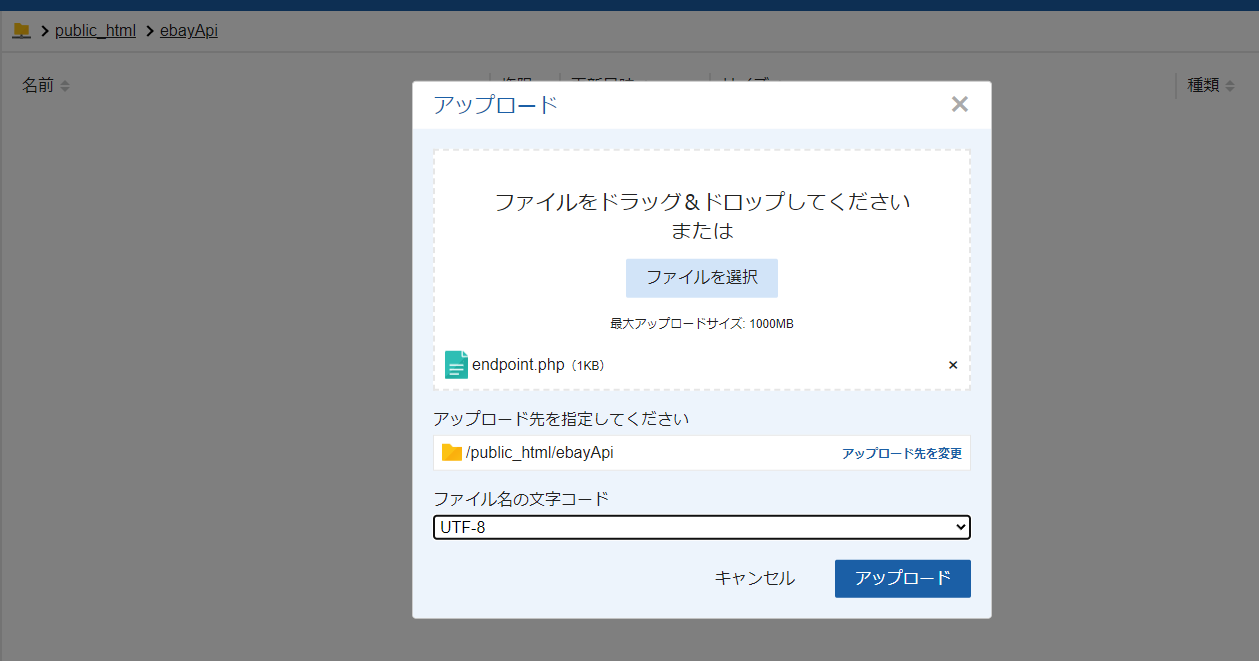
フォルダを作って受信プログラムファイルを保存
サブFTPアカウントの一覧からログインする
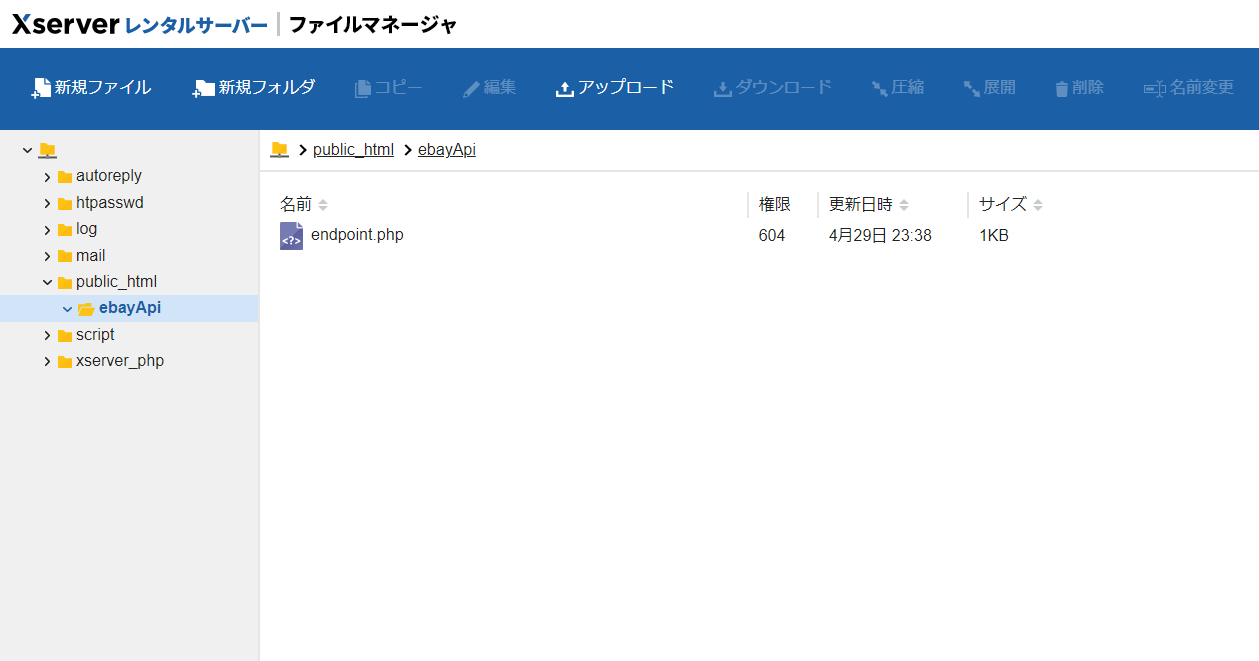
サーバー内に入れたことを確認 ※「public_html」がルートディレクトリ
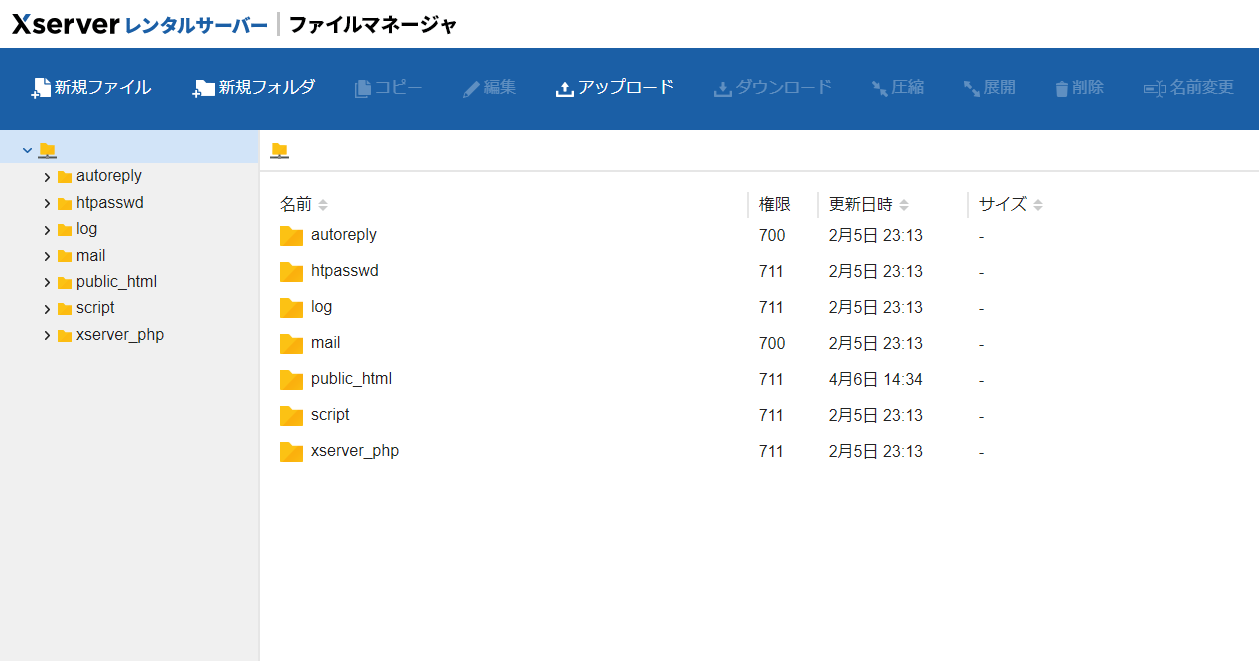
「public_html」の下に「ebayApi」フォルダを作って受信プログラムの「endpoint.php」をアップロードする
設置完了
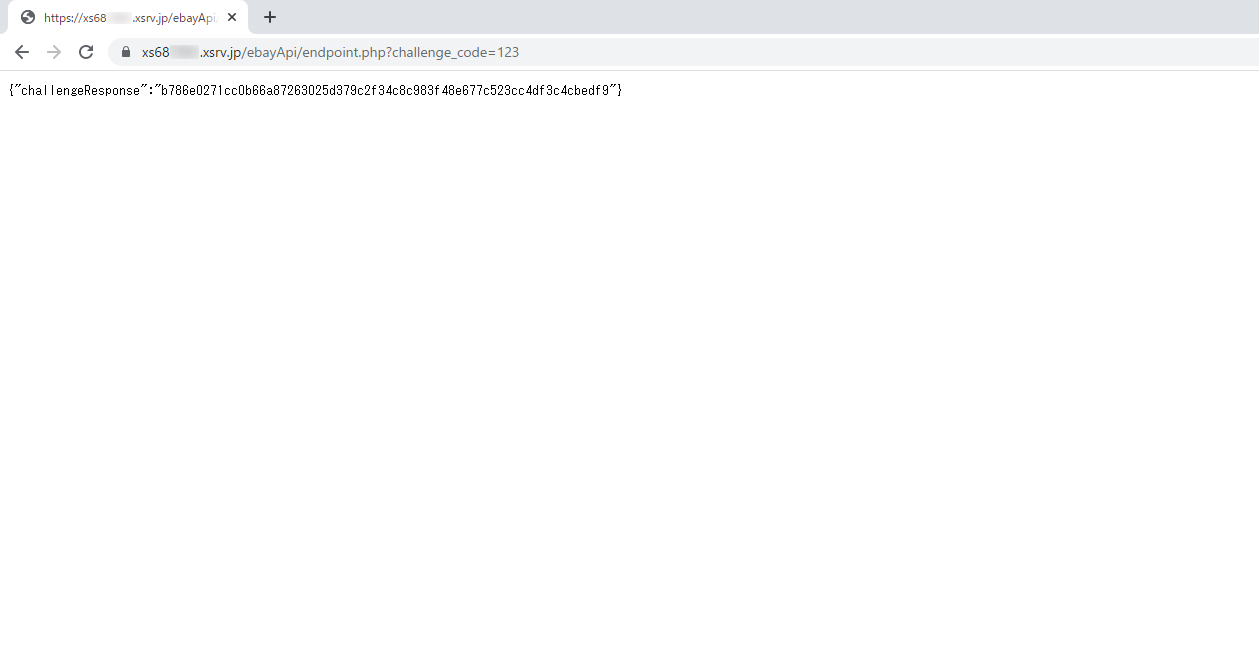
念のためURLを直直接叩いてワークフローページのサンプルと同じような値が返ってくるかチェック
あとがき
ファイルの設置できたらURLとverificationTokenが必要になるのでこれを控えてデベロッパープログラムに戻ってくだされ

コメント